


RIFFS
Last week, we talked about how we cut to the front of the line with our new band:

Two days before the gig we had our first (only) rehearsal. Up until that point, most of us had never met—I was the only one who knew everyone.
Here’s how we did it.
Practice Before Rehearsal
All of this runs on the assumption that each member of the band will:
do their homework beforehand
be able to adjust to any changes on the fly
Still… assembling a three-hour show in a two-hour rehearsal is a big ask.
Let’s look at the systems that allowed us to do this with confidence.
Step 1: Song Selection
Jasper & I started by creating a spreadsheet of songs we might play:
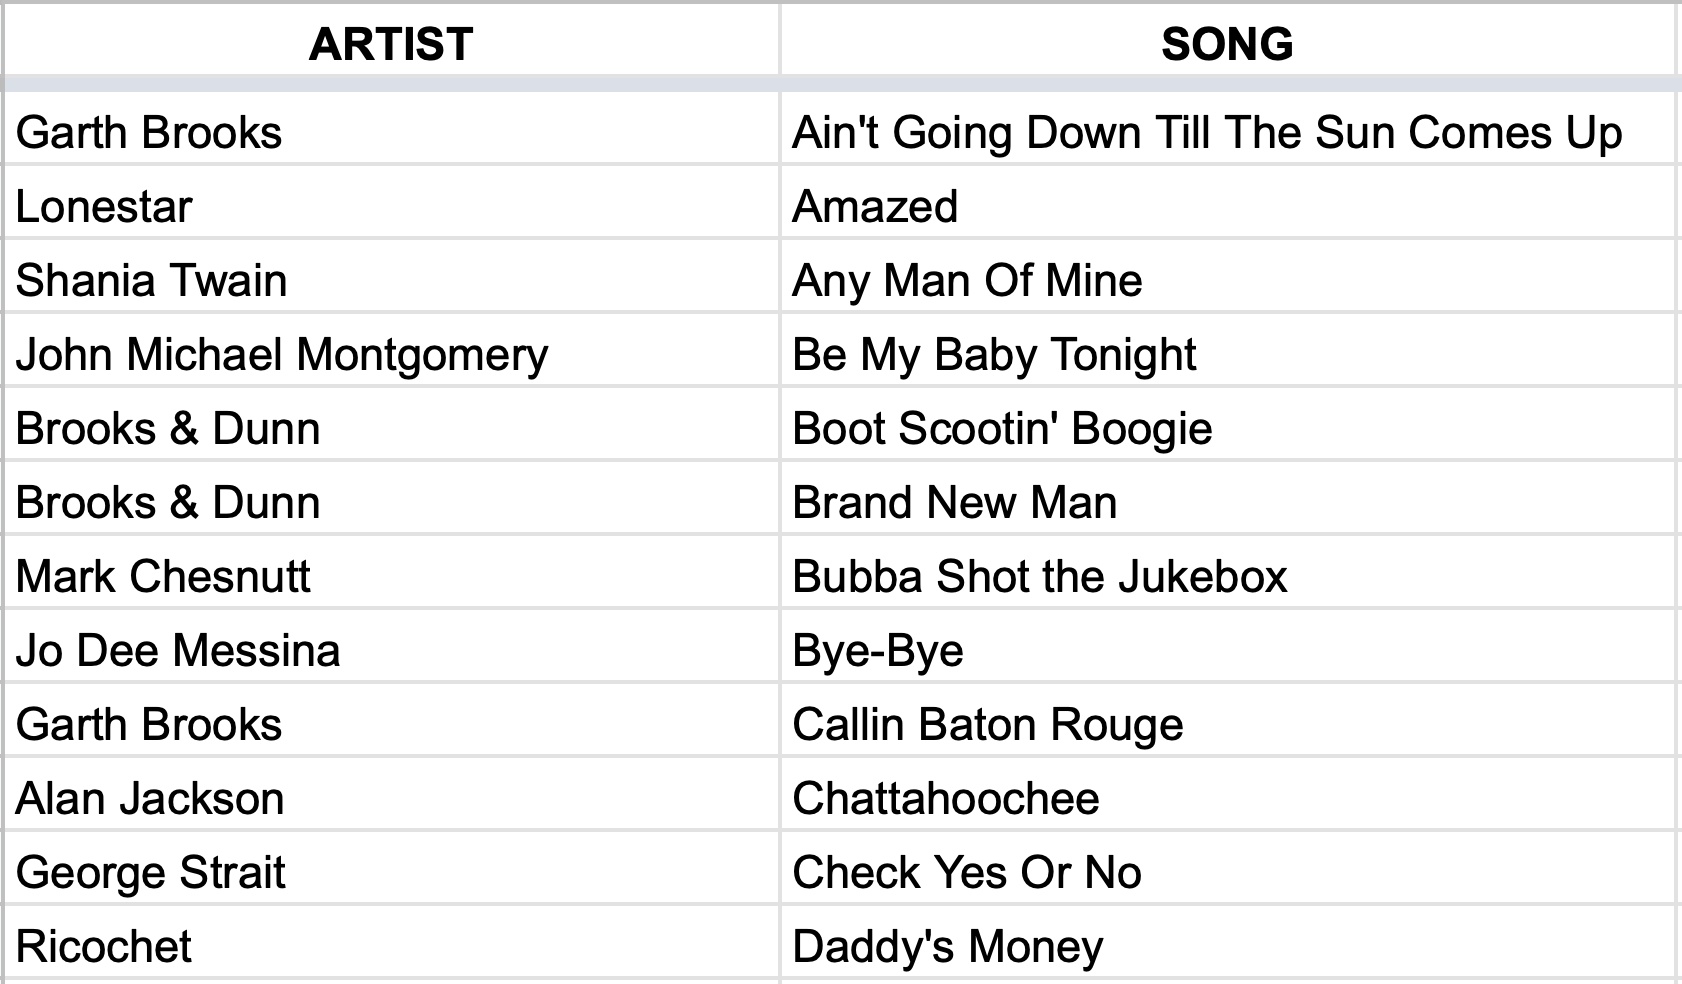
Since we’re developing this with the talent buyer who’ll be booking us, we made sure to solicit his feedback. He shared the Spotify playlist they play at the bar’s 90s Country Night, and we combed it for ideas.
This is important: if you’re doing something that involves building consensus (writing a setlist, naming a band, deciding how to solve a problem, etc), it’s a good idea to get everyone to submit their ideas. Two things will happen:
Everyone will feel better about the parts that don’t match their suggestions.
They’ll feel a pride of ownership over any parts that do match their suggestions… even if you were gonna do it that way already.
Were we going to play Any Man Of Mine anyway? Yes, of course. But now the guy who’s helping us birth this thing feels like we did it because he suggested it. Win-win.
From this list, we created a scoring system, allowed for some vetos (Achy Breaky Heart? 🤮), and came up with the top 50 songs.
In this step, we also ID’d any songs that needed to be transposed for Jasper to sing them:

Step 2: Build A Practice Set In The DAW
The goal was to have every song in one giant DAW file, with:
everything warped onto the grid
(including transposed audio where applicable)
with measure numbers that match the charts
including count ins
a separate click track (ie not just the DAW’s metronome)
the harmony parts recorded onto their own tracks
Everyone in this band has Logic Pro, so that’s what we used:
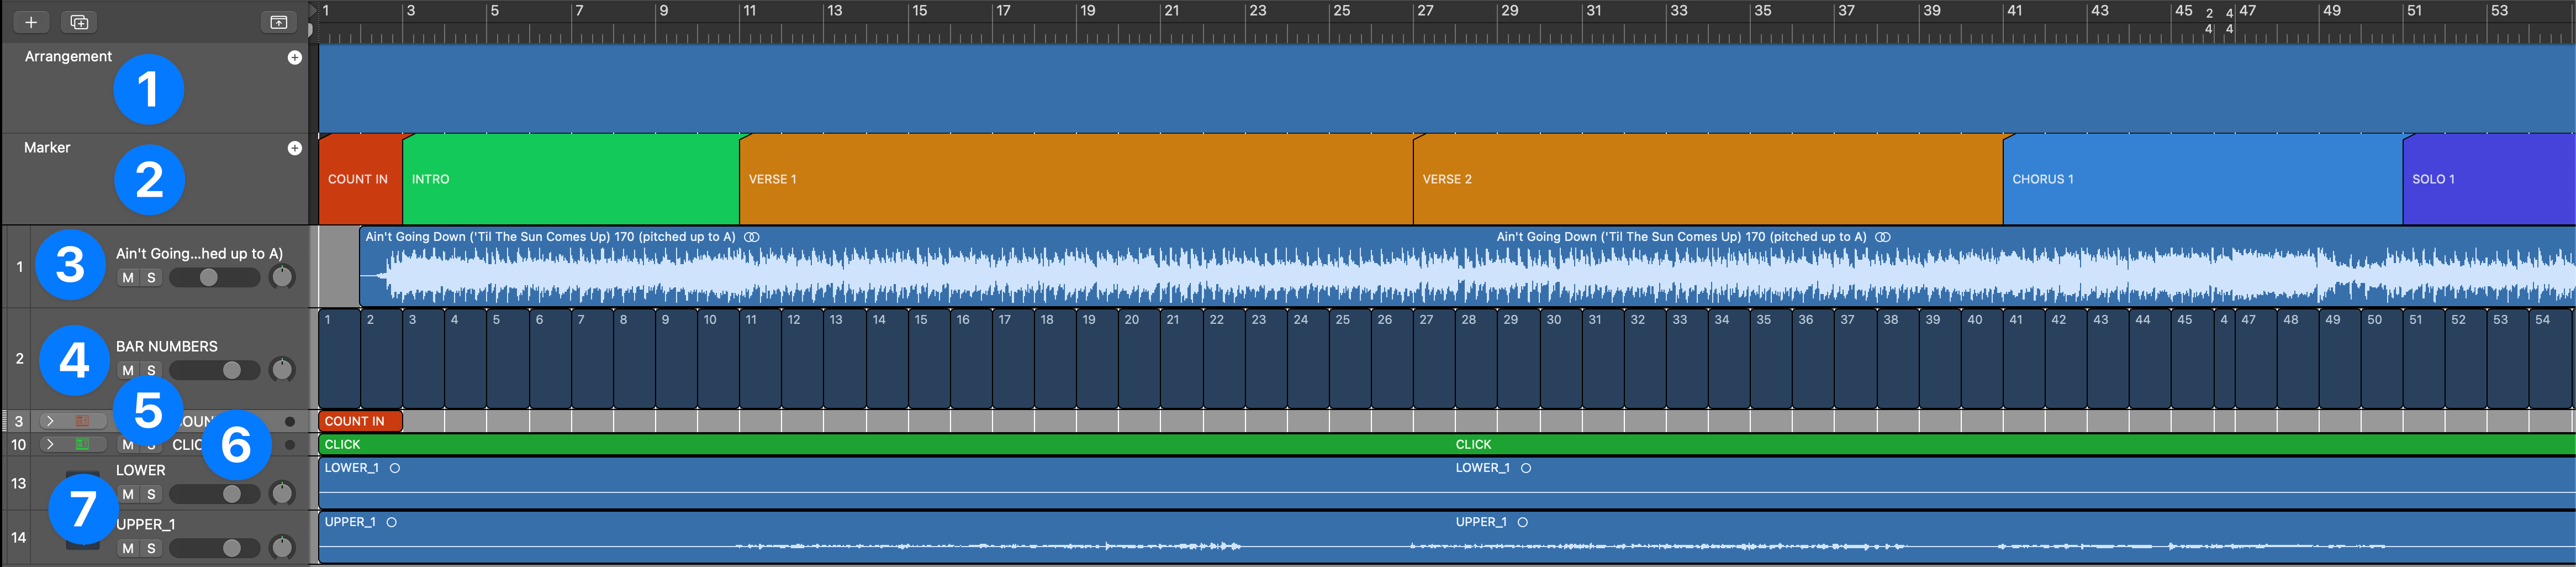
Arrangement Track divvied by song.
Marker Track divvied by song section.
The warped & pitched audio.
Bar numbers made of empty MIDI clips.
Count-ins made with sampled “1 2 3 4” in a drum machine.
Click track, also sampled & in a drum machine.
After I made the first version of this, Jasper went through and recorded harmony parts he wanted Lincoln & I to sing.
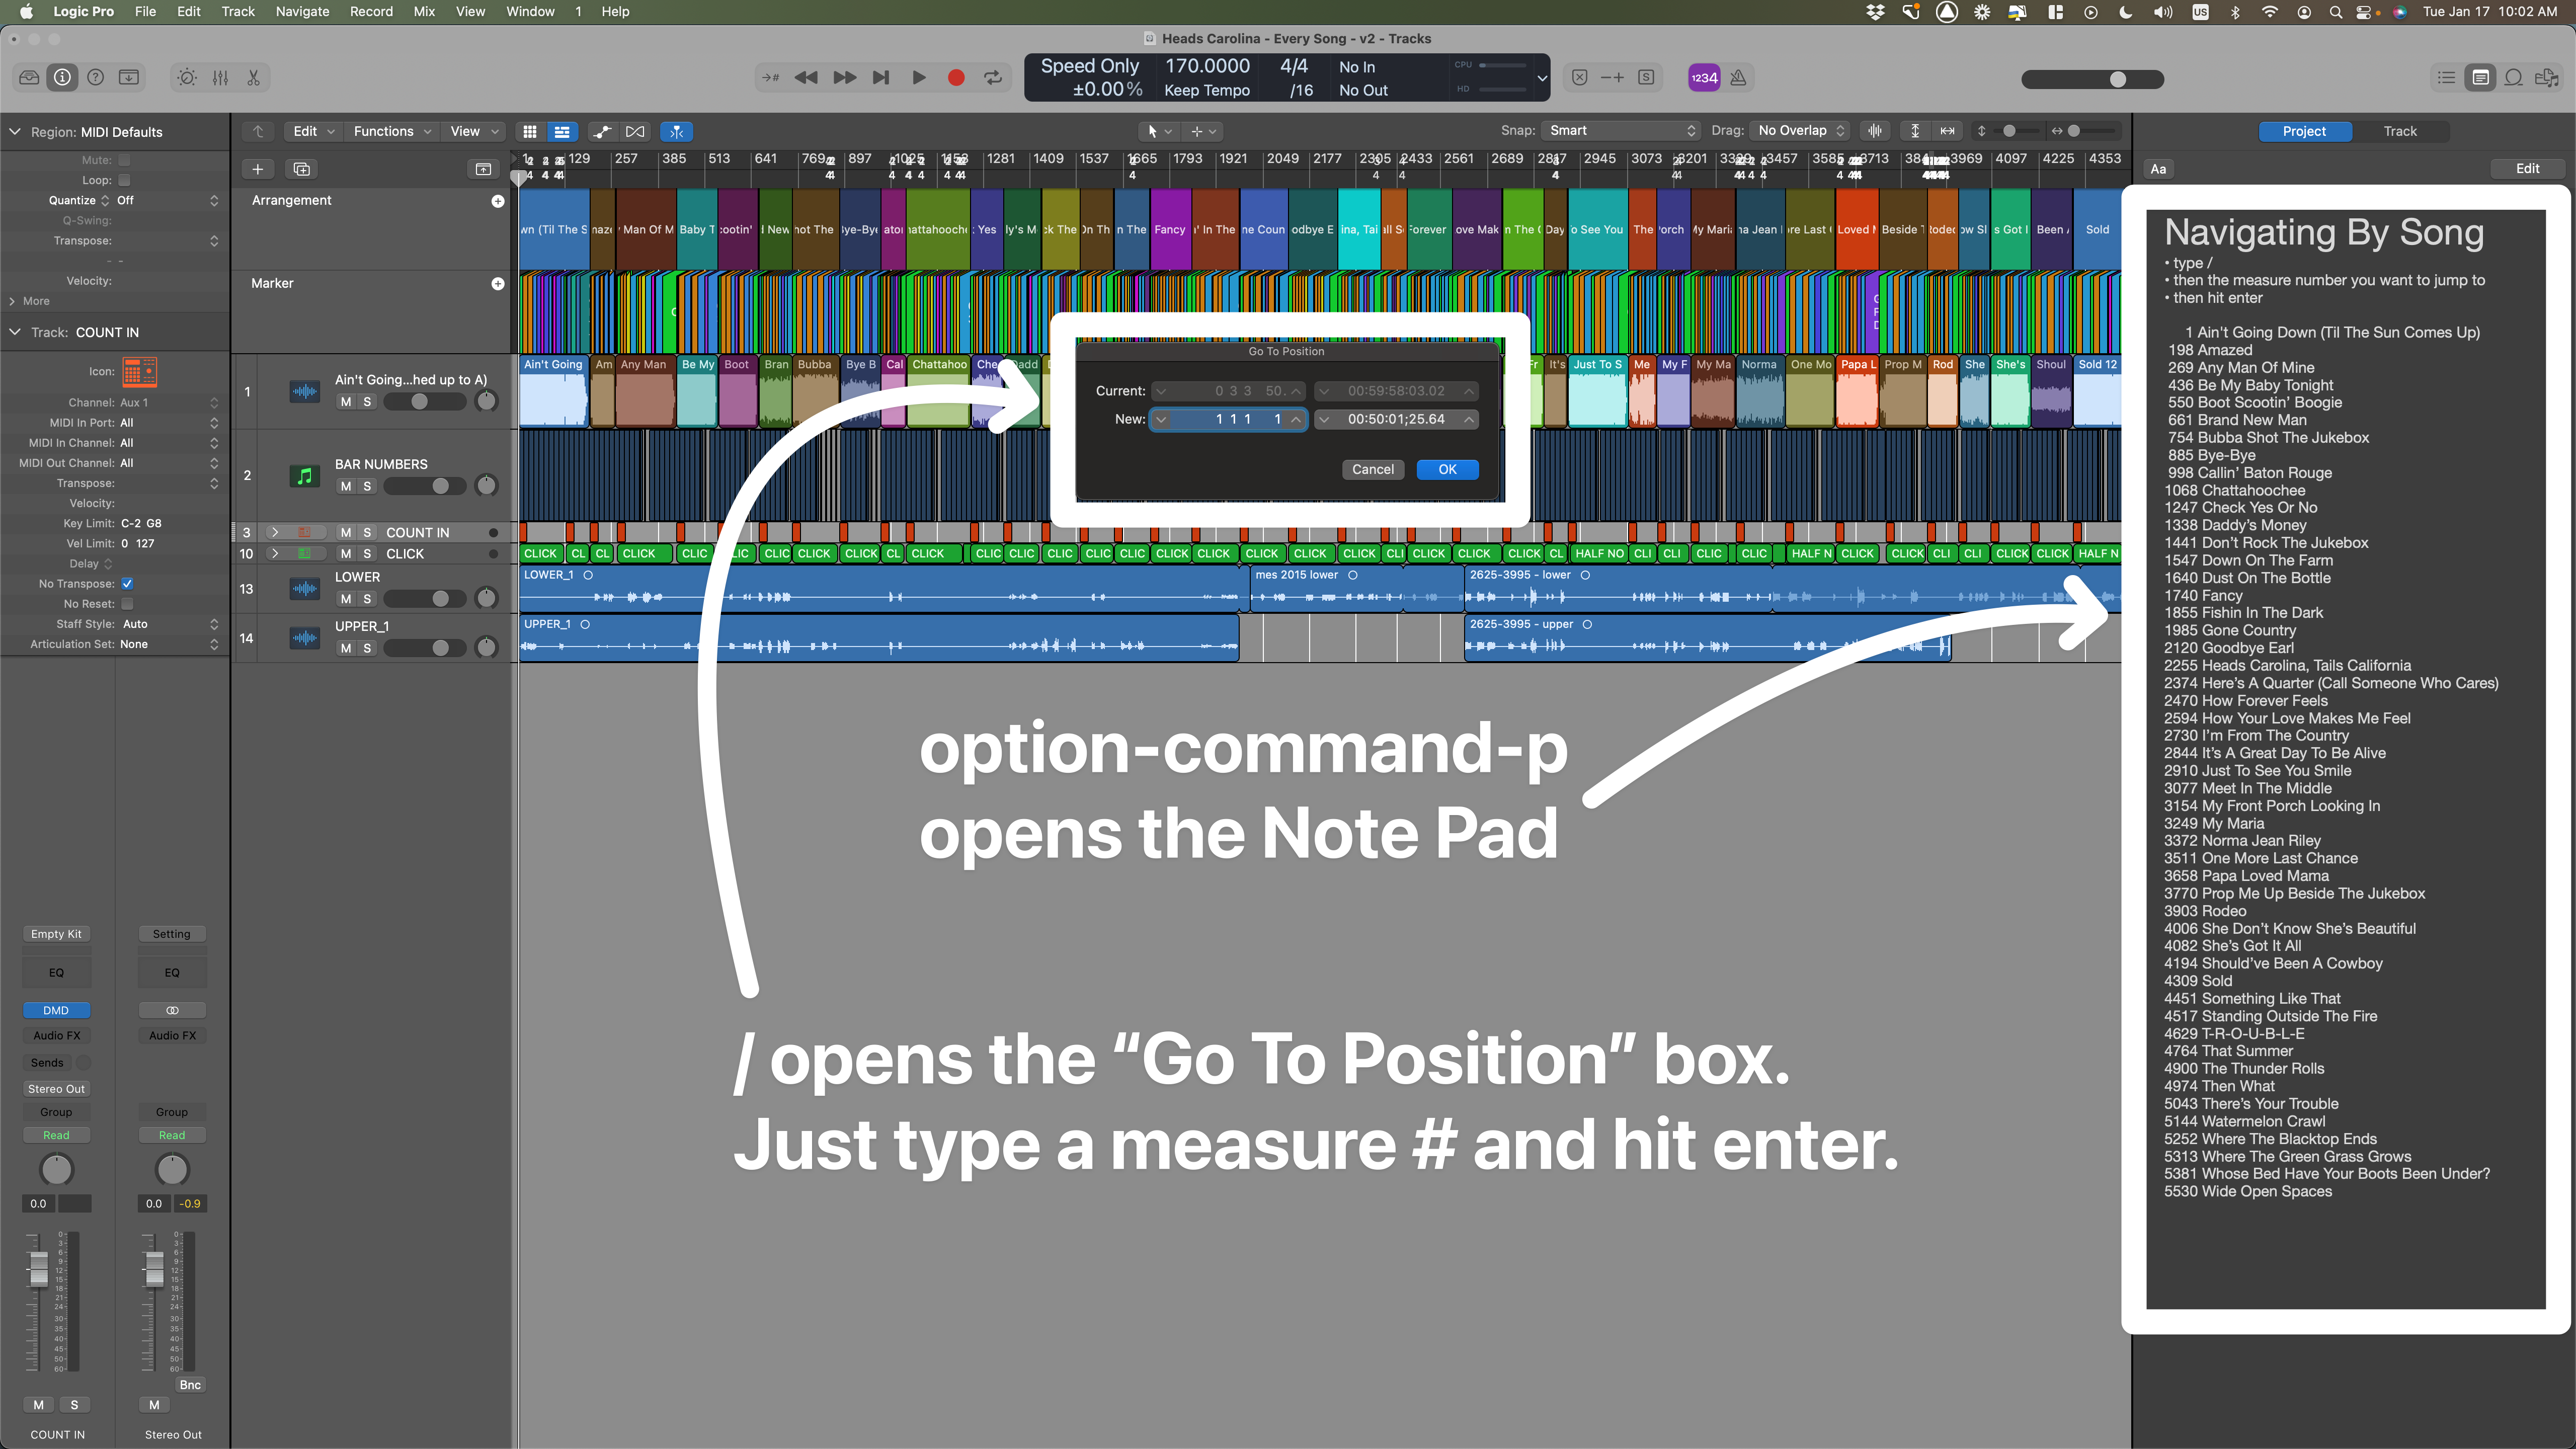
Zoomed way out, the file looks like this:

As you might imagine, that’s a bit cumbersome to navigate.
So in the Note Pad, I recorded the starting measure of each song.
To jump to any song:
open the Note Pad with
option-command-ptype
/then the measure number
then hit
return
There’s also a bunch of good navigation tricks to have dialed into your hands:
>and<move one measure ahead & backhold down
shiftwhile typing>and<to jump 8 measures at timehold down
optionwhile typing>and<to jump to the next Marker(conveniently, the Cycle Ribbon moves along with it, looping the next song section)
If you need to slow anything down, you can use Varispeed to adjust by percentage:
Step 3: Write Charts
We’ll go over the details of my current charts next week in The State Of The Chart.
Be sure to subscribe so you don’t miss it:
Here’s the broad strokes:
bad charts perpetuate a reliance on them
good charts provide the clarity needed to memorize the songs
Or more specifically:
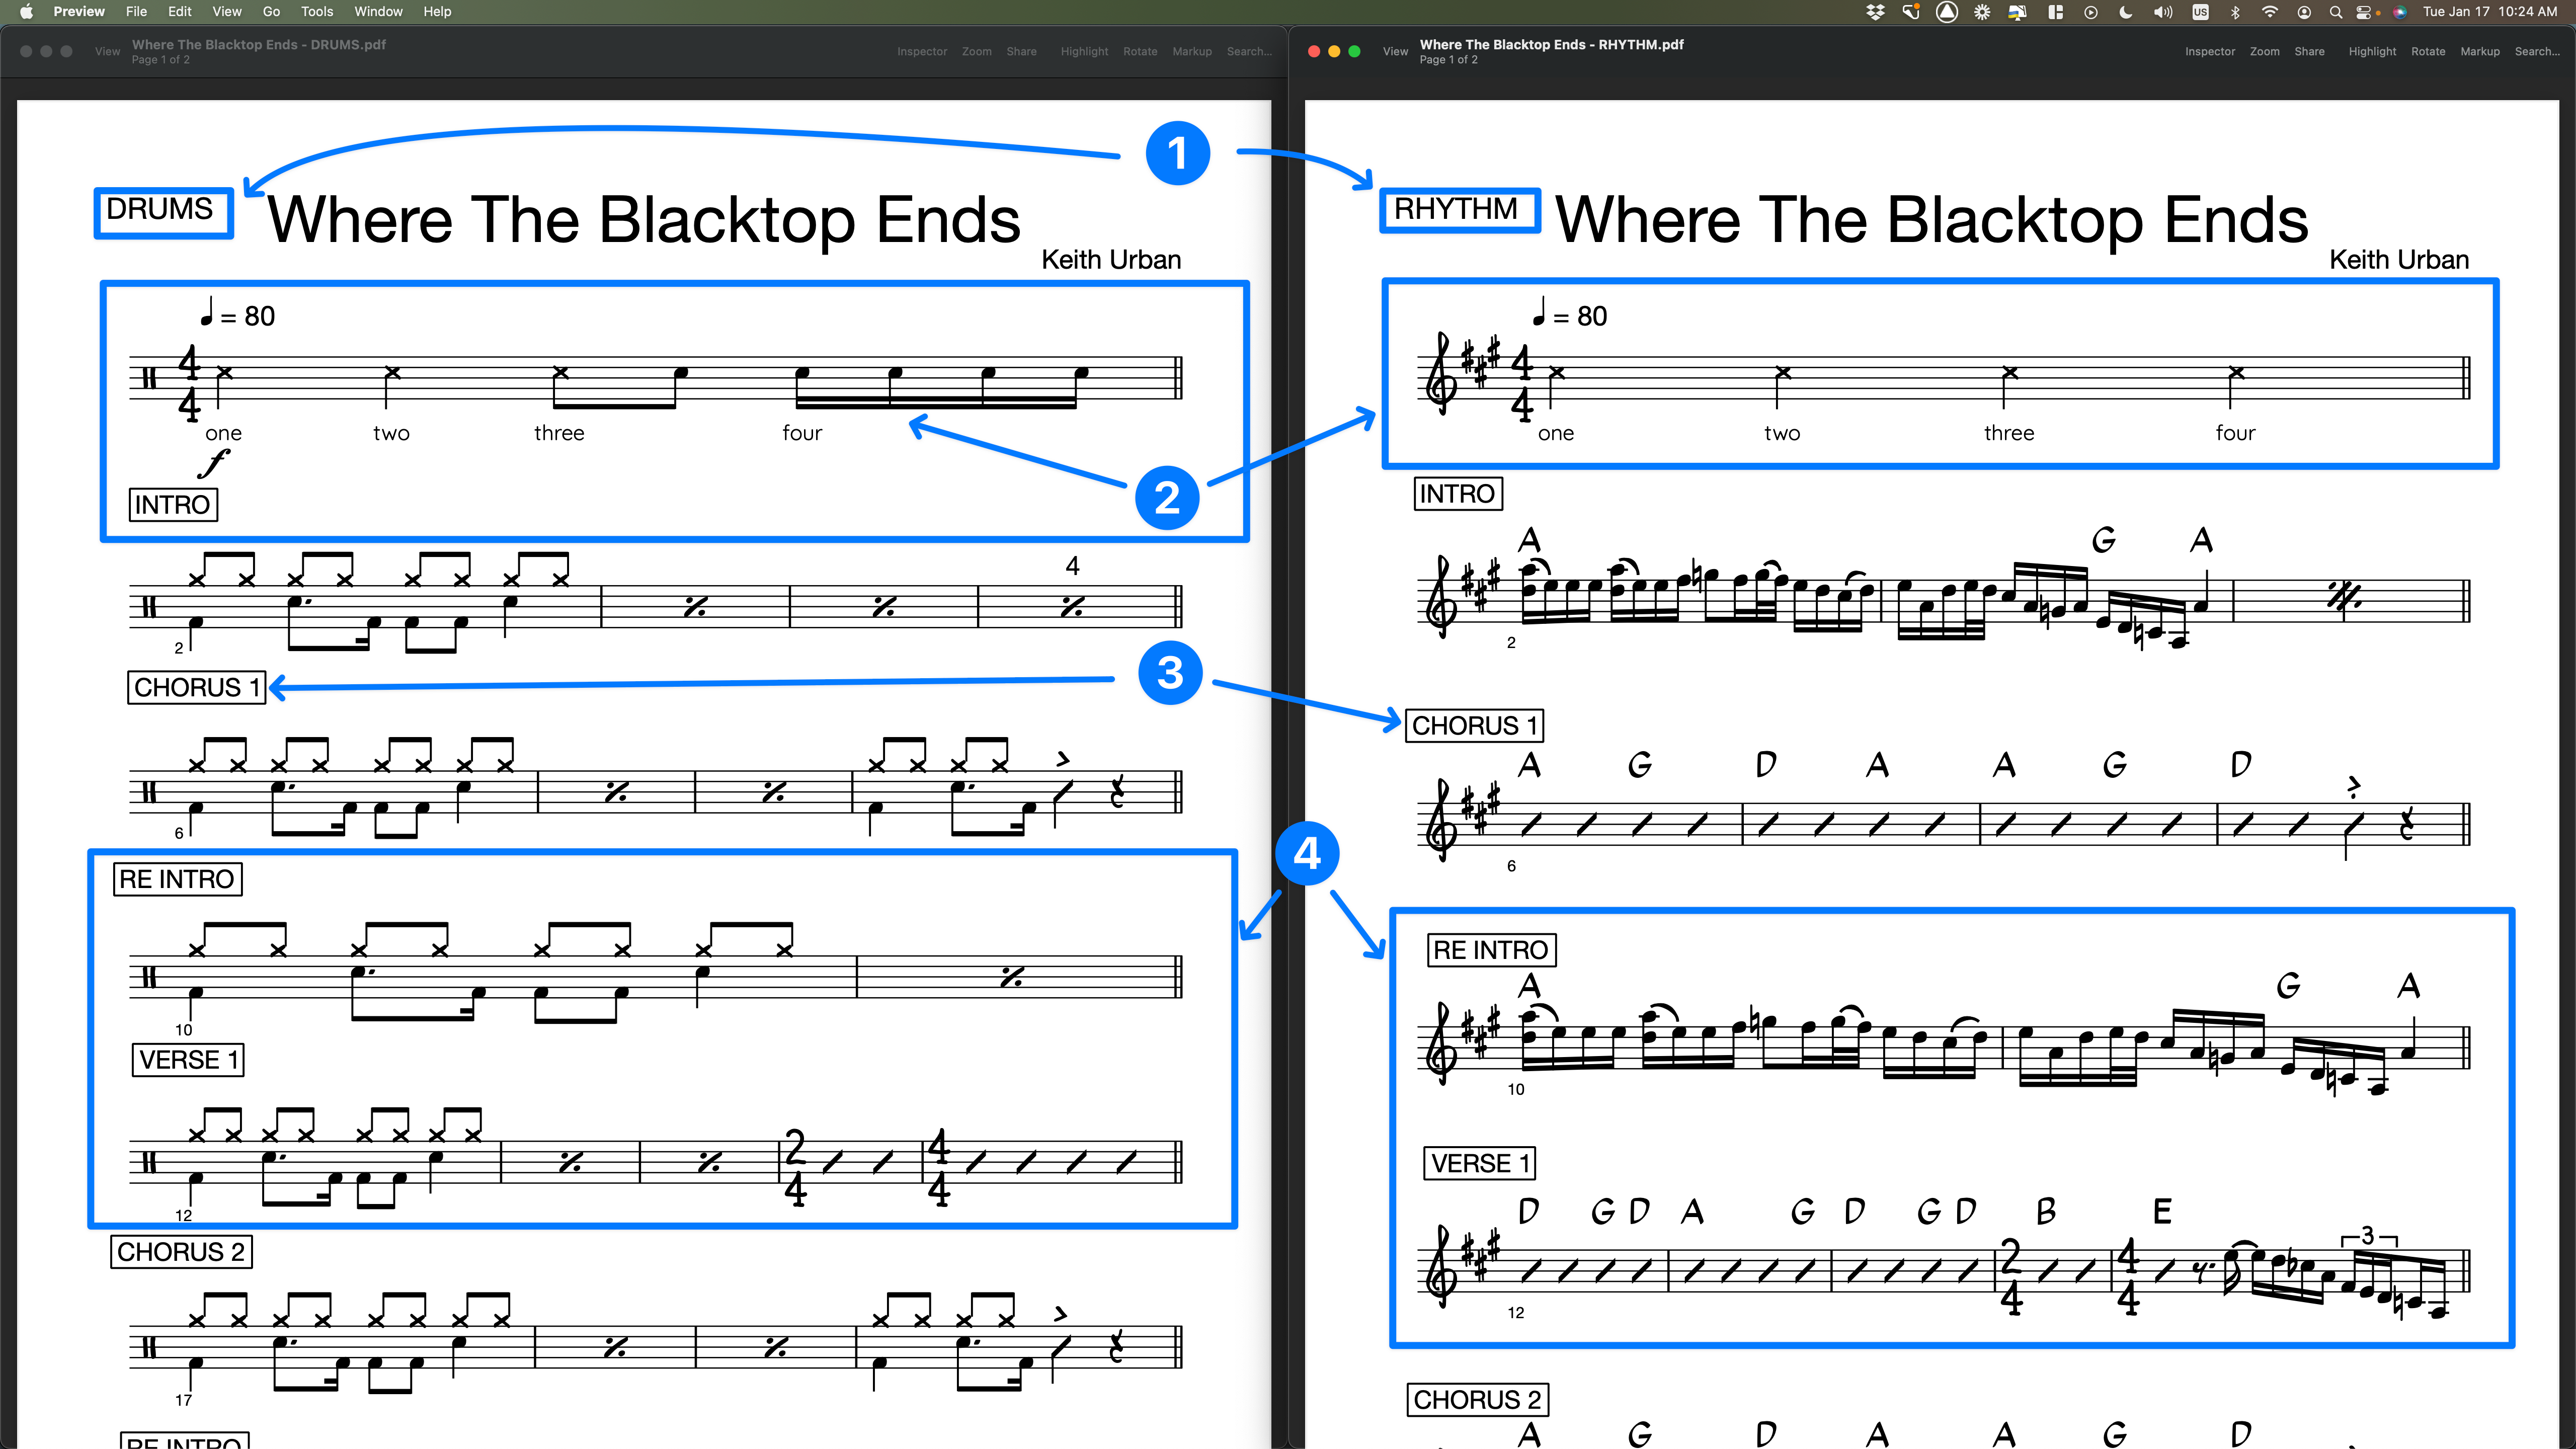
The drummer needs their own chart. The rest of us can share.
Don’t be overly prescriptive. This drum fill is notated because it’s a key part of the song. Otherwise, just let people do the jobs you hired them for.
Labelling sections of songs with Intro/Verse/Chorus/etc is better than lettering them. The singers will never know what you mean by “let’s take it from B,” but you don’t have to be looking at the chart to understand “let’s take it from Chorus 1.”
Make liberal use of measure repeats & slash notation. Again: don’t be overly prescriptive. The drummer needs to know the groove, how many times it repeats, and how loud to be. The rest of us need to know the chords, some important riffs, and any rhythmic hits.
Again, we’ll dive into the nitty gritty details of writing charts for a band next week… including where this system failed (and why).
RECS:
I love using in-ear monitors.
More control, better sound, lower stage volume.
But that shit ain’t cheap—one group I tour with spent nearly $20,000 on this.
(Adam Neely has a great breakdown of his band’s setup here.)
For the 90s country band, I have a dirt-cheap workaround:
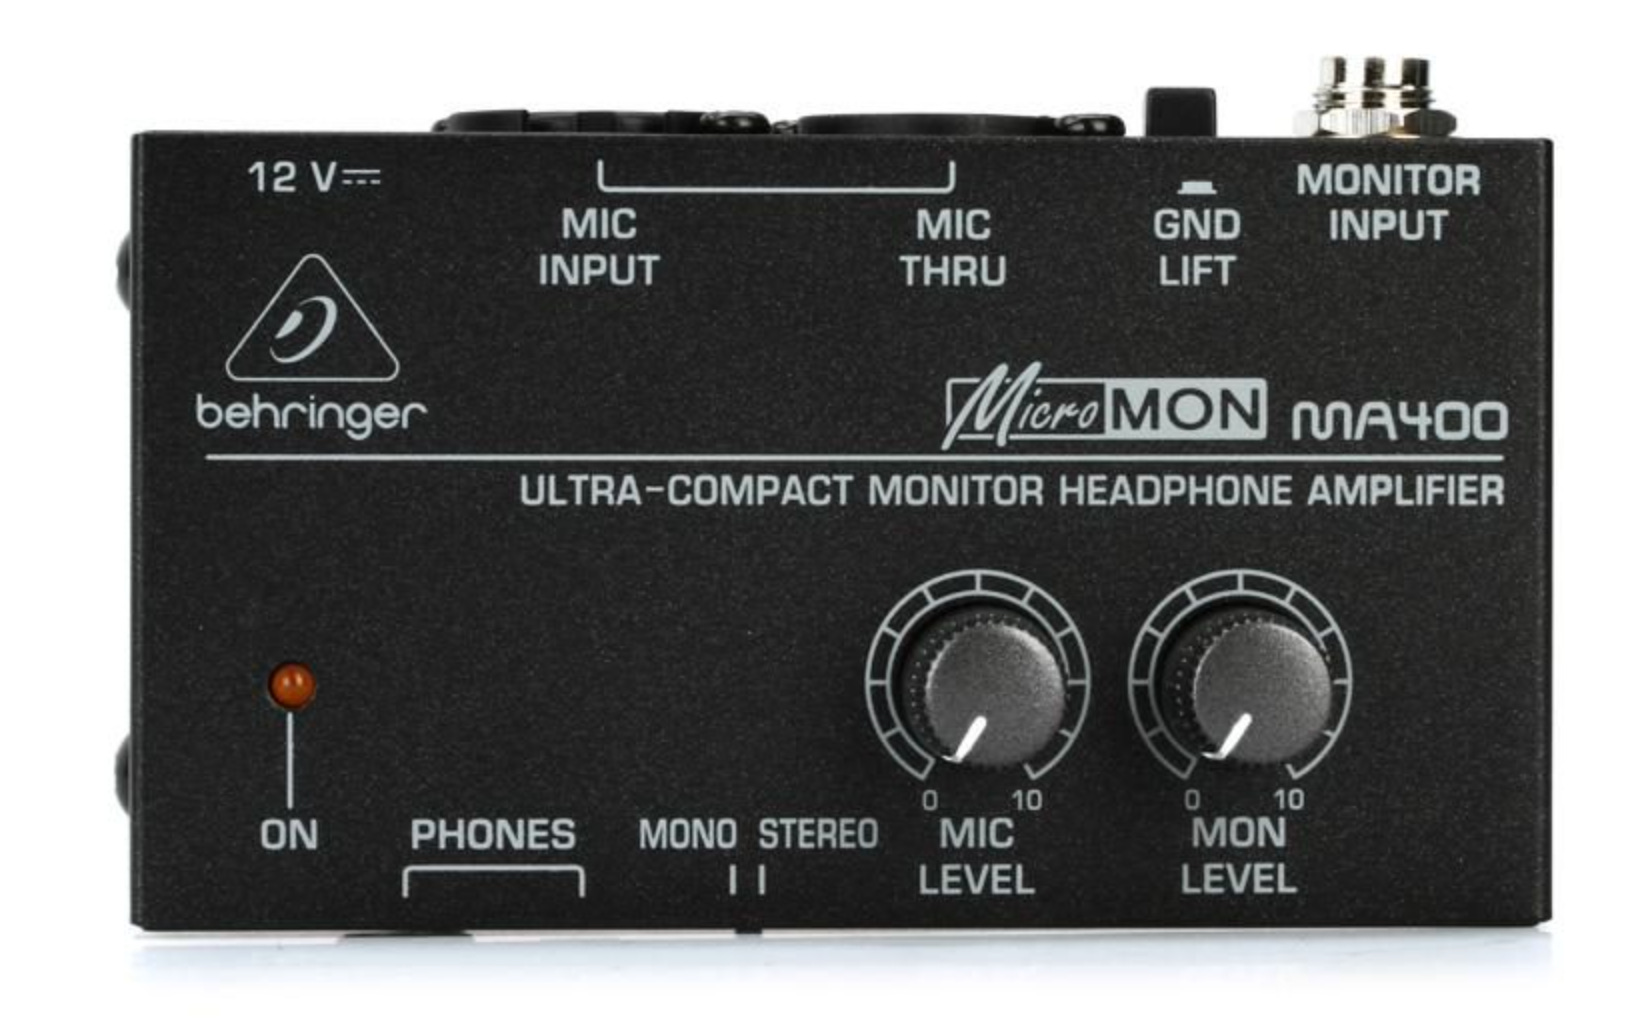
The soundguy is already planning to send a monitor mix to the wedge via XLR.
Instead, I run that XLR into the MIC INPUT of the MA400, then run one of the 1/4” outputs from my HX Stomp into the MONITOR INPUT.
“More me” is now fully under my control.
(Looks like they’re back up around $35, but I caught it on sale for $20.)
CHARTS:
Here’s the gnarly riff from Where The Blacktop Ends:
I tabbed it for you:

SMARTS:
It’s deeply satisfying to play…
…once you manage to get it under your fingers.
For me, the key insight was getting the fingerings right:

slides vs hammers
slide down with the 2nd finger so the 1st finger is still available
reach over with the 2nd finger for that 4th string E
That’s all I got this week.
See you next Wednesday,
Josh